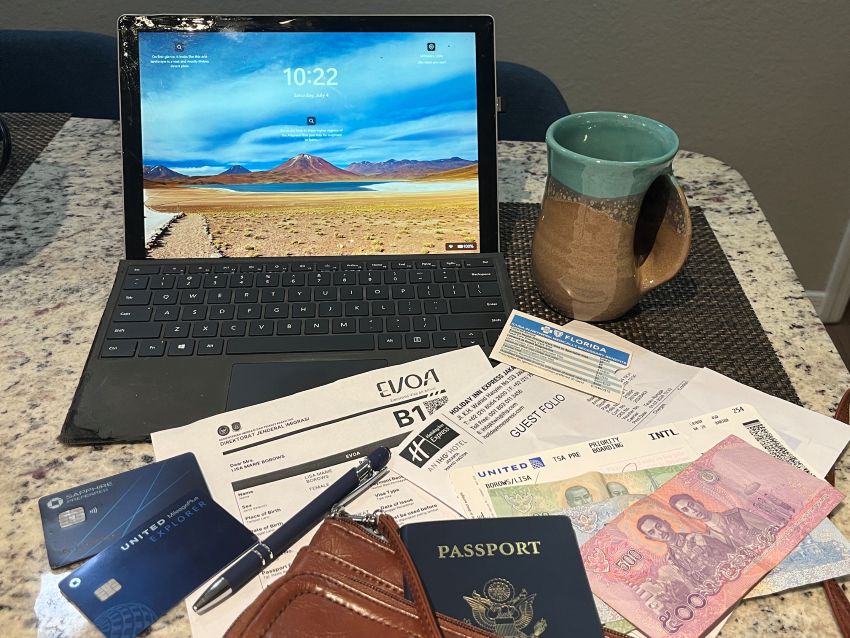
This post contains affiliate links. If you make a purchase, I may earn a small commission at no additional cost to you. As an Amazon Associate, I earn from qualifying purchases.
Planning an international trip is exciting, but if you’re anything like me, the closer departure day gets, the more you start wondering, Am I forgetting something?
Packing is easy. If you forget a shirt or a toothbrush, you can always buy another one.
Your travel documents are different.
Forgetting your passport, missing a visa requirement, or not having the paperwork you need at immigration can quickly turn an exciting trip into a stressful one.
The good news is it doesn’t have to be complicated.
If you’re still planning your trip, be sure to read my How to Plan Your First Solo Trip guide. It walks you through everything from choosing a destination and booking flights to packing and getting ready to leave.
Now let’s go through the travel documents needed before every international trip.
In a hurry? Scroll to the bottom of the post, to download my
Travel Documents Checklist
to use before your next international trip.
Table of Contents
Passport
Your passport is the one document you absolutely can’t travel without, so it’s the first thing I check whenever I start planning a trip.
Before every international trip, I make sure:
- My passport won’t expire soon.
- It has enough blank pages if my destination requires them.
- It’s in good condition with no significant damage.
Many countries require your passport to be valid for at least six months beyond the date you arrive. It’s an easy detail to miss, but one that can stop your trip before it even begins.
If you discover your passport has expired or is close to expiring, you may be able to get an emergency passport if you’re traveling within about seven days. It’s reassuring to know that’s an option, but I definitely wouldn’t wait that long to check.
As soon as I decide where I’m going, I pull out my passport and make sure everything is in order. Then I don’t have to think about it again. Who am I kidding? I’ll still totally check it again at least three more times just to make sure.
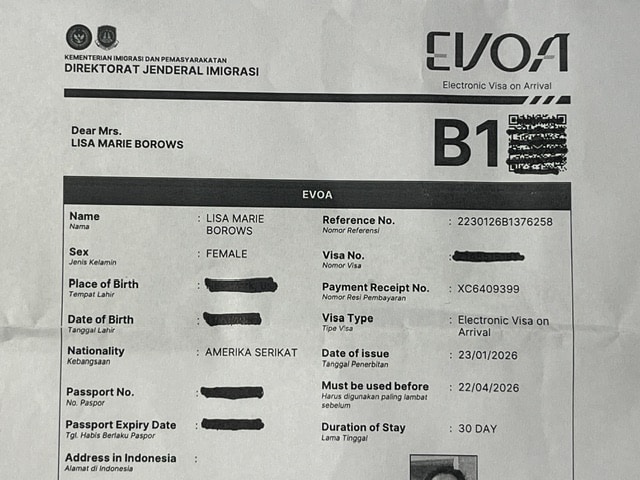
E-Visa on arrival for Indonesia
Visa Requirements
This is probably the part that feels the most confusing when you’re planning your first international trip, but once you understand the basics, it’s really not that bad.
A visa is simply permission from another country that allows you to enter for a specific reason, like tourism.
Not every country requires a visa. Whether you need one depends on two things:
- The country you’re visiting.
- The country that issued your passport.
For example, travelers with a U.S. passport may have different requirements than someone traveling with a Canadian, Australian, or U.K. passport.
I never assume I know the requirements, even if I’ve visited a country before.
If you’re traveling with a U.S. passport, the U.S. Department of State website is the first place I check. It tells you about:
- Passport validity requirements
- Visa requirements
- Entry requirements
- Travel advisories
- Health information
If you have a passport from another country, use your government’s official travel or foreign affairs website to check the requirements.
If a visa is required, you’ll usually get it one of three ways: online as an eVisa, a Visa on arrival after you land, or through an embassy or consulate before you leave. Most visas for US passport holders are eVisa or on arrival.
Some countries visas are approved quickly, while others take several weeks, so checking early can save you a lot of stress later.
Electronic Travel Authorizations
Here’s something that catches a lot of first-time international travelers by surprise.
Even if you don’t need a visa, you may still need approval before you travel.
For example, many travelers visiting Europe will need ETIAS (European Travel Information and Authorization System) before traveling to countries in the Schengen Area.
The United Kingdom also has its own Electronic Travel Authorization (ETA).
These aren’t visas, but they are still required before you board your flight. The important thing to remember is this: No visa doesn’t always mean no paperwork.
That’s why I always check the entry requirements for every trip, even if I’ve been there before. Rules can change, and it only takes a minute to make sure you have everything you need.
Proof of Onward Travel
Some countries may ask you to show proof that you’ll be leaving before your allowed stay ends.
Usually, your return flight home is all you’ll need.
If you’re traveling on to another country instead of heading home, your onward flight works just as well. In some cases, a train or bus ticket is also accepted.
I print a copy and keep it in my travel document holder so I can hand it over quickly if an airline employee or immigration officer asks for it.
It’s one of those little things that you never think about until someone asks to see it.
Flight Confirmations
Even though airline apps have made traveling much easier, I still print copies of my flight confirmations.
That includes my departing flight, return flight, and any connecting flights.
If my phone battery dies, I can’t get a signal, or I’m rushing through an unfamiliar airport, I know I still have everything I need right in front of me.
Hotel Reservations
Yup, I print my hotel confirmations too.
Occasionally, an immigration officer will ask where you’re staying, especially on your first night.
Having the confirmation ready means I’m not standing there scrolling through my email while people wait behind me.
It also makes arriving at my hotel easier because I already have the address, reservation number, and booking details with me.
Choosing the right place to stay is another important part of feeling confident as a solo traveler. I always look for safe, walkable locations close to transportation.
Travel Insurance
Travel insurance is one of those things you hope you never need, but if something unexpected happens, you’ll be glad you have it.
Personally, I don’t buy separate medical travel insurance because my current health insurance covers me when I’m traveling internationally. For trip cancellation, baggage protection, and other travel benefits, I rely on the coverage that comes with my travel credit card.
That setup works well for me, but it may not be the right choice for you.
If your health insurance doesn’t cover you outside your home country, I strongly recommend buying travel medical insurance before you leave.
I’ve heard too many stories of travelers who became sick or injured overseas and ended up with thousands of dollars in unexpected medical bills. It’s not something any of us like to think about, but it’s much better to have coverage and not need it than the other way around.
One company many people use is SafetyWing. If you’re looking for travel medical insurance, it’s worth comparing their plans to see if they’re a good fit for your trip.
I’ve also put together a free Just in Case Travel Guide that walks you through what to do if things don’t go as planned, like losing your passport, missing a flight, getting sick, or losing your phone while you’re traveling. It’s the kind of guide I hope you never need, but you’ll be glad you have.
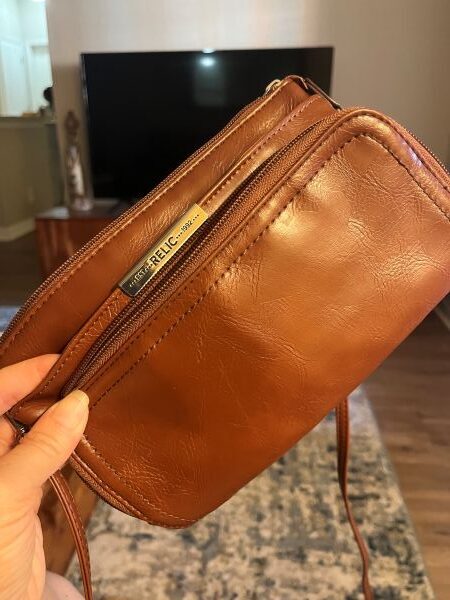
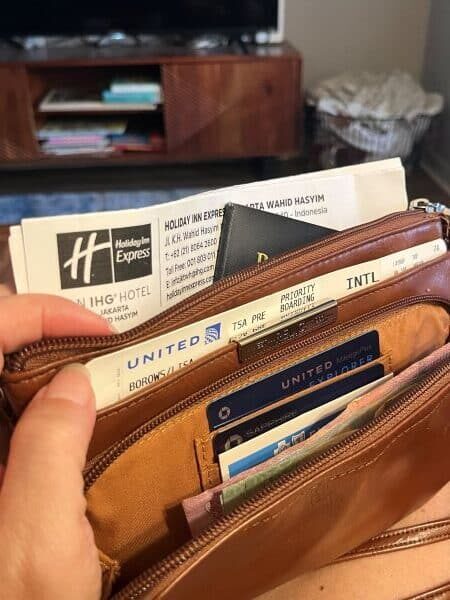
My Travel Document Holder
Once I have everything printed, I keep it all in a simple crossbody purse. There are several types of travel document holders made specifically to hold passports and documents, but I like using my crossbody purse. It has zipper pockets, credit card slots, and holds everything I need.
You’ll just want to make sure you use something that will keep your documents secure so nothing will fall out.
I also keep a list of my favorite travel essentials and gear that I use on my own trips, including items that make organizing documents and packing easier.
My travel document holder always stays on my person or in my personal item, so I can reach it easily during flights, airport check-in, and immigration.
Inside I keep:
- Passport
- Boarding passes
- Printed flight confirmations
- Hotel reservations
- Travel insurance policy
- Visa or travel authorization
- Proof of onward travel
- A pen for customs forms
- Credit card and cash
I don’t overcomplicate it. If I need something during my trip, I know exactly where to find it.
Confidence Tip: Keep a second credit card and extra cash in a second location as back-ups just in case.
Travel Documents Checklist
To make things easier, I created a printable Travel Documents Checklist you can use before every international trip. Handy, right?
I use the same checklist every time I travel. It keeps me from forgetting small but important details and helps me feel a little bit calmer before I leave.
Print it, check things off as you go, and tuck it into your travel document holder when you’re done.